Cardboard Models
Because,... because!
We had loads of cardboard lying around, I wanted to make a cardboard airplane model. I sketched it out a bit, and then built it in one evening- way up until 4 am.
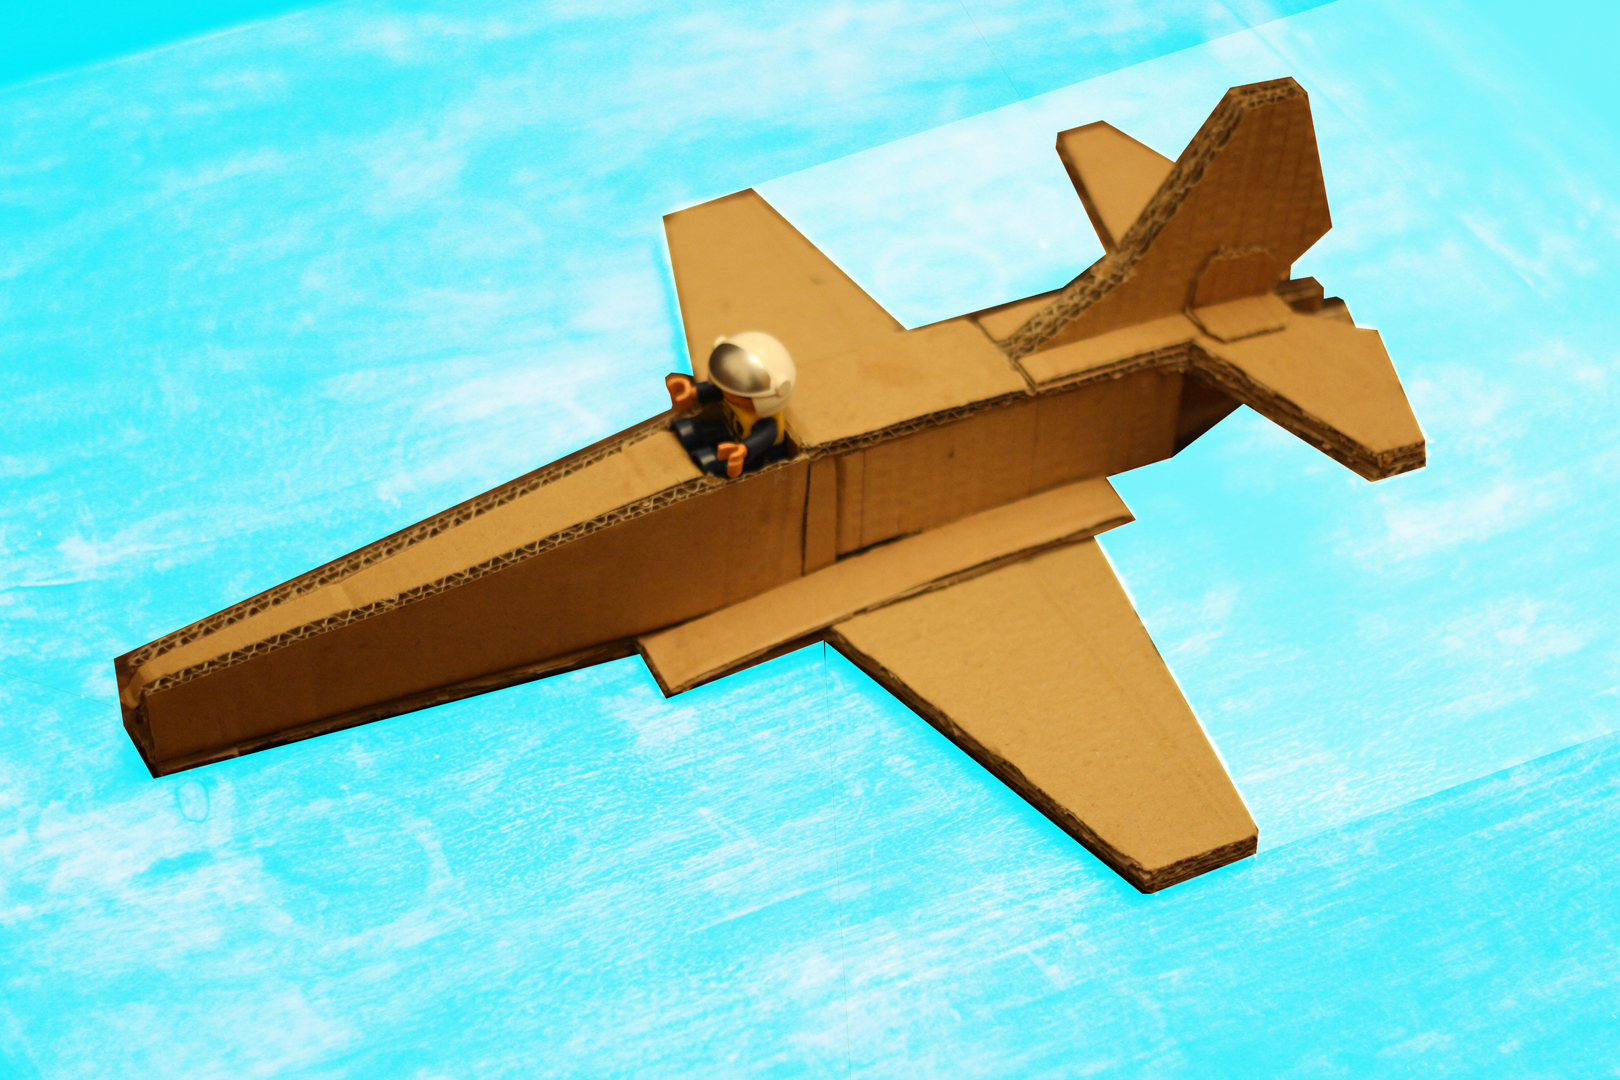
Mustang
When I was at the airplane museum once with my kid, I picked him up a chinese plastic Mustang P-51D. It was a large and sturdy model, which he could play with, and a love for all things Mustang was born. Even better suited to my pacifist nature, the Mustang has as much history as a race plane as it has as a warbird.
So I started planning to design a Mustang in cardboard- one he could assemble, if not cut, himself. I started out by buying the plans from Fiddler's Green. I might not end up using them, but they'd be a good place to start.
Geometry
From my first model I'd understood cardboard can be used to quickly assemble 3d shapes from layering 2d cutouts. I'd print out the plan on paper, cut out the parts, then glue them onto cardboard and cut out the cardboard. This would be enough to build a nice model. 2 layers would make a solid wing. The top wings would be attached to the outer hull. And the horizontal stab likewise would be an extension of the outer hull, with toothpicks for reinforcement.
3 views
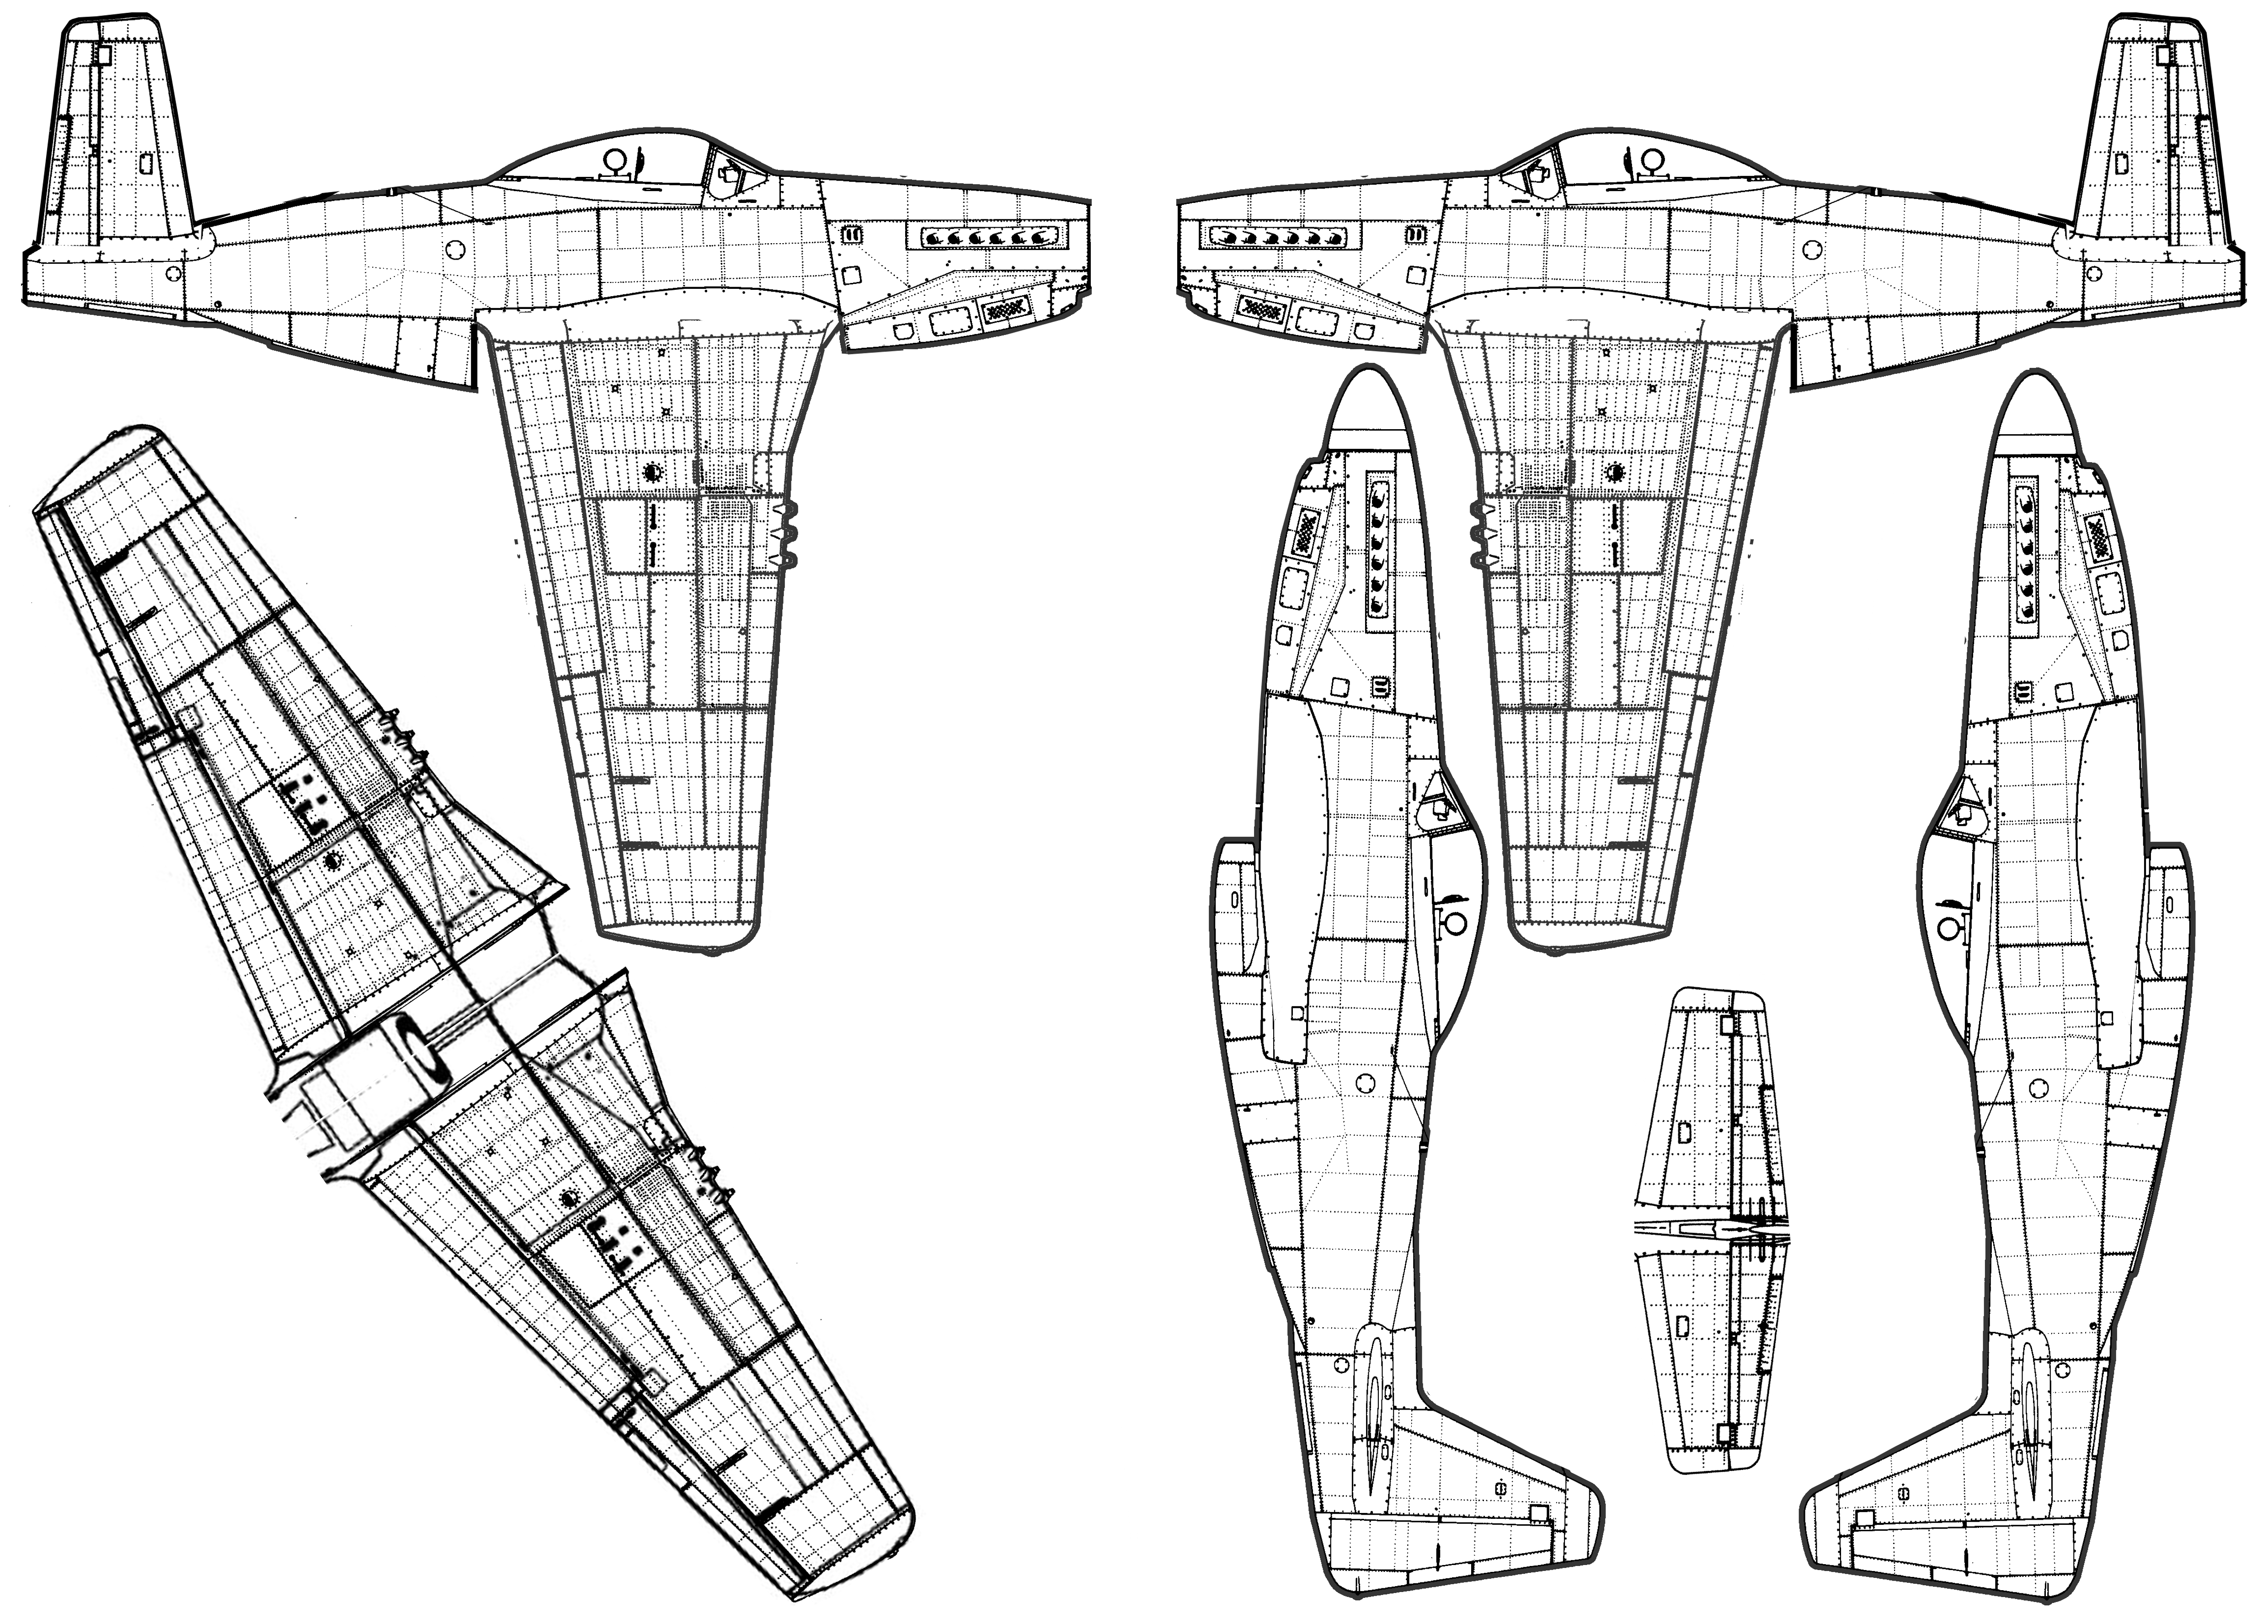
As the Fiddler's Green plans use a foldaround 3D construction, I'd need to start working from 3-view scale drawings instead.
A few thing I'd need to keep in mind; without knowing the thickness of the cardboard several bits would need to flexible. The first was the top of the hull. To cover this with paper I'd need to fold it around from one of the hulls. The other bit would be the lower wing part. To make sure it could adapt to the wing I'd need to make it oversize, then cut to size after. It was tempting to make landing gear doors that could be cut out- however, those refinements could be added in later models- plenty of cardboard!
I finally found a bunch of great reference drawings by a guy named oosiksmith- didn't find a site for him. These were line drawings, but then with the laser pritner at work I wasn't going to get any color on them anyway.
Design
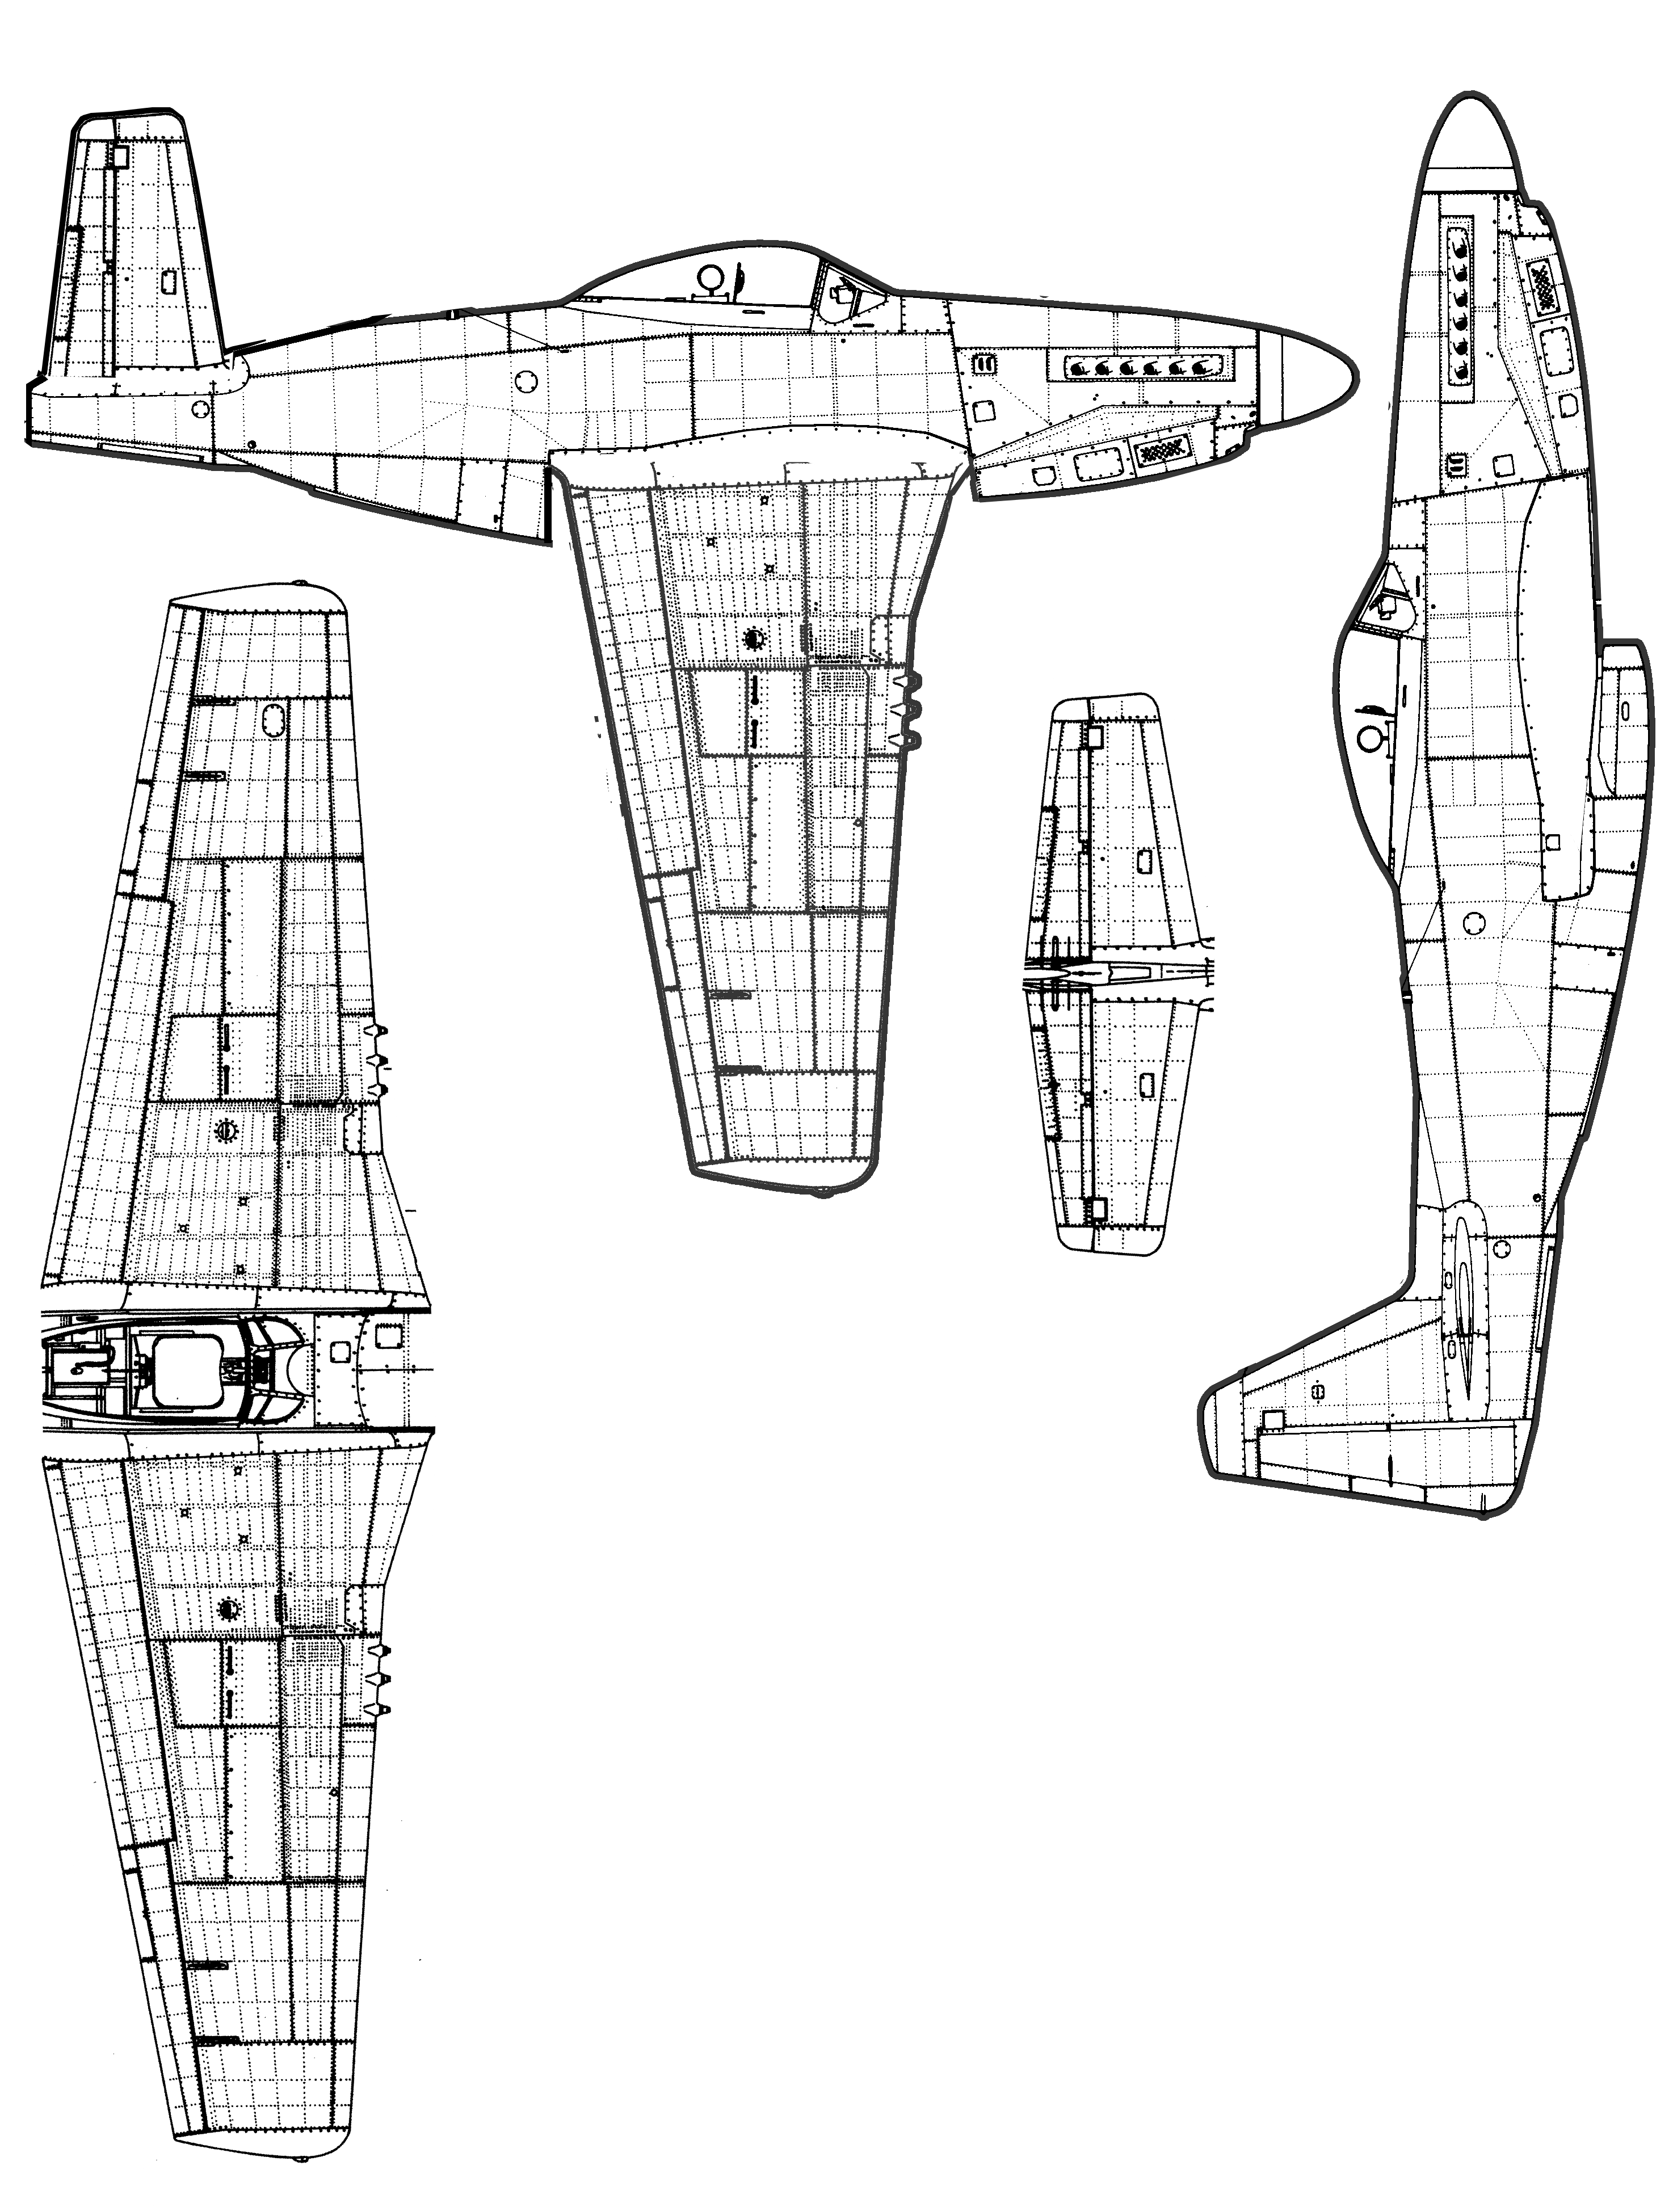
The first thing I had to do was to get the 3view cut into pieces. The best view to work with turned out to be the rivet view.
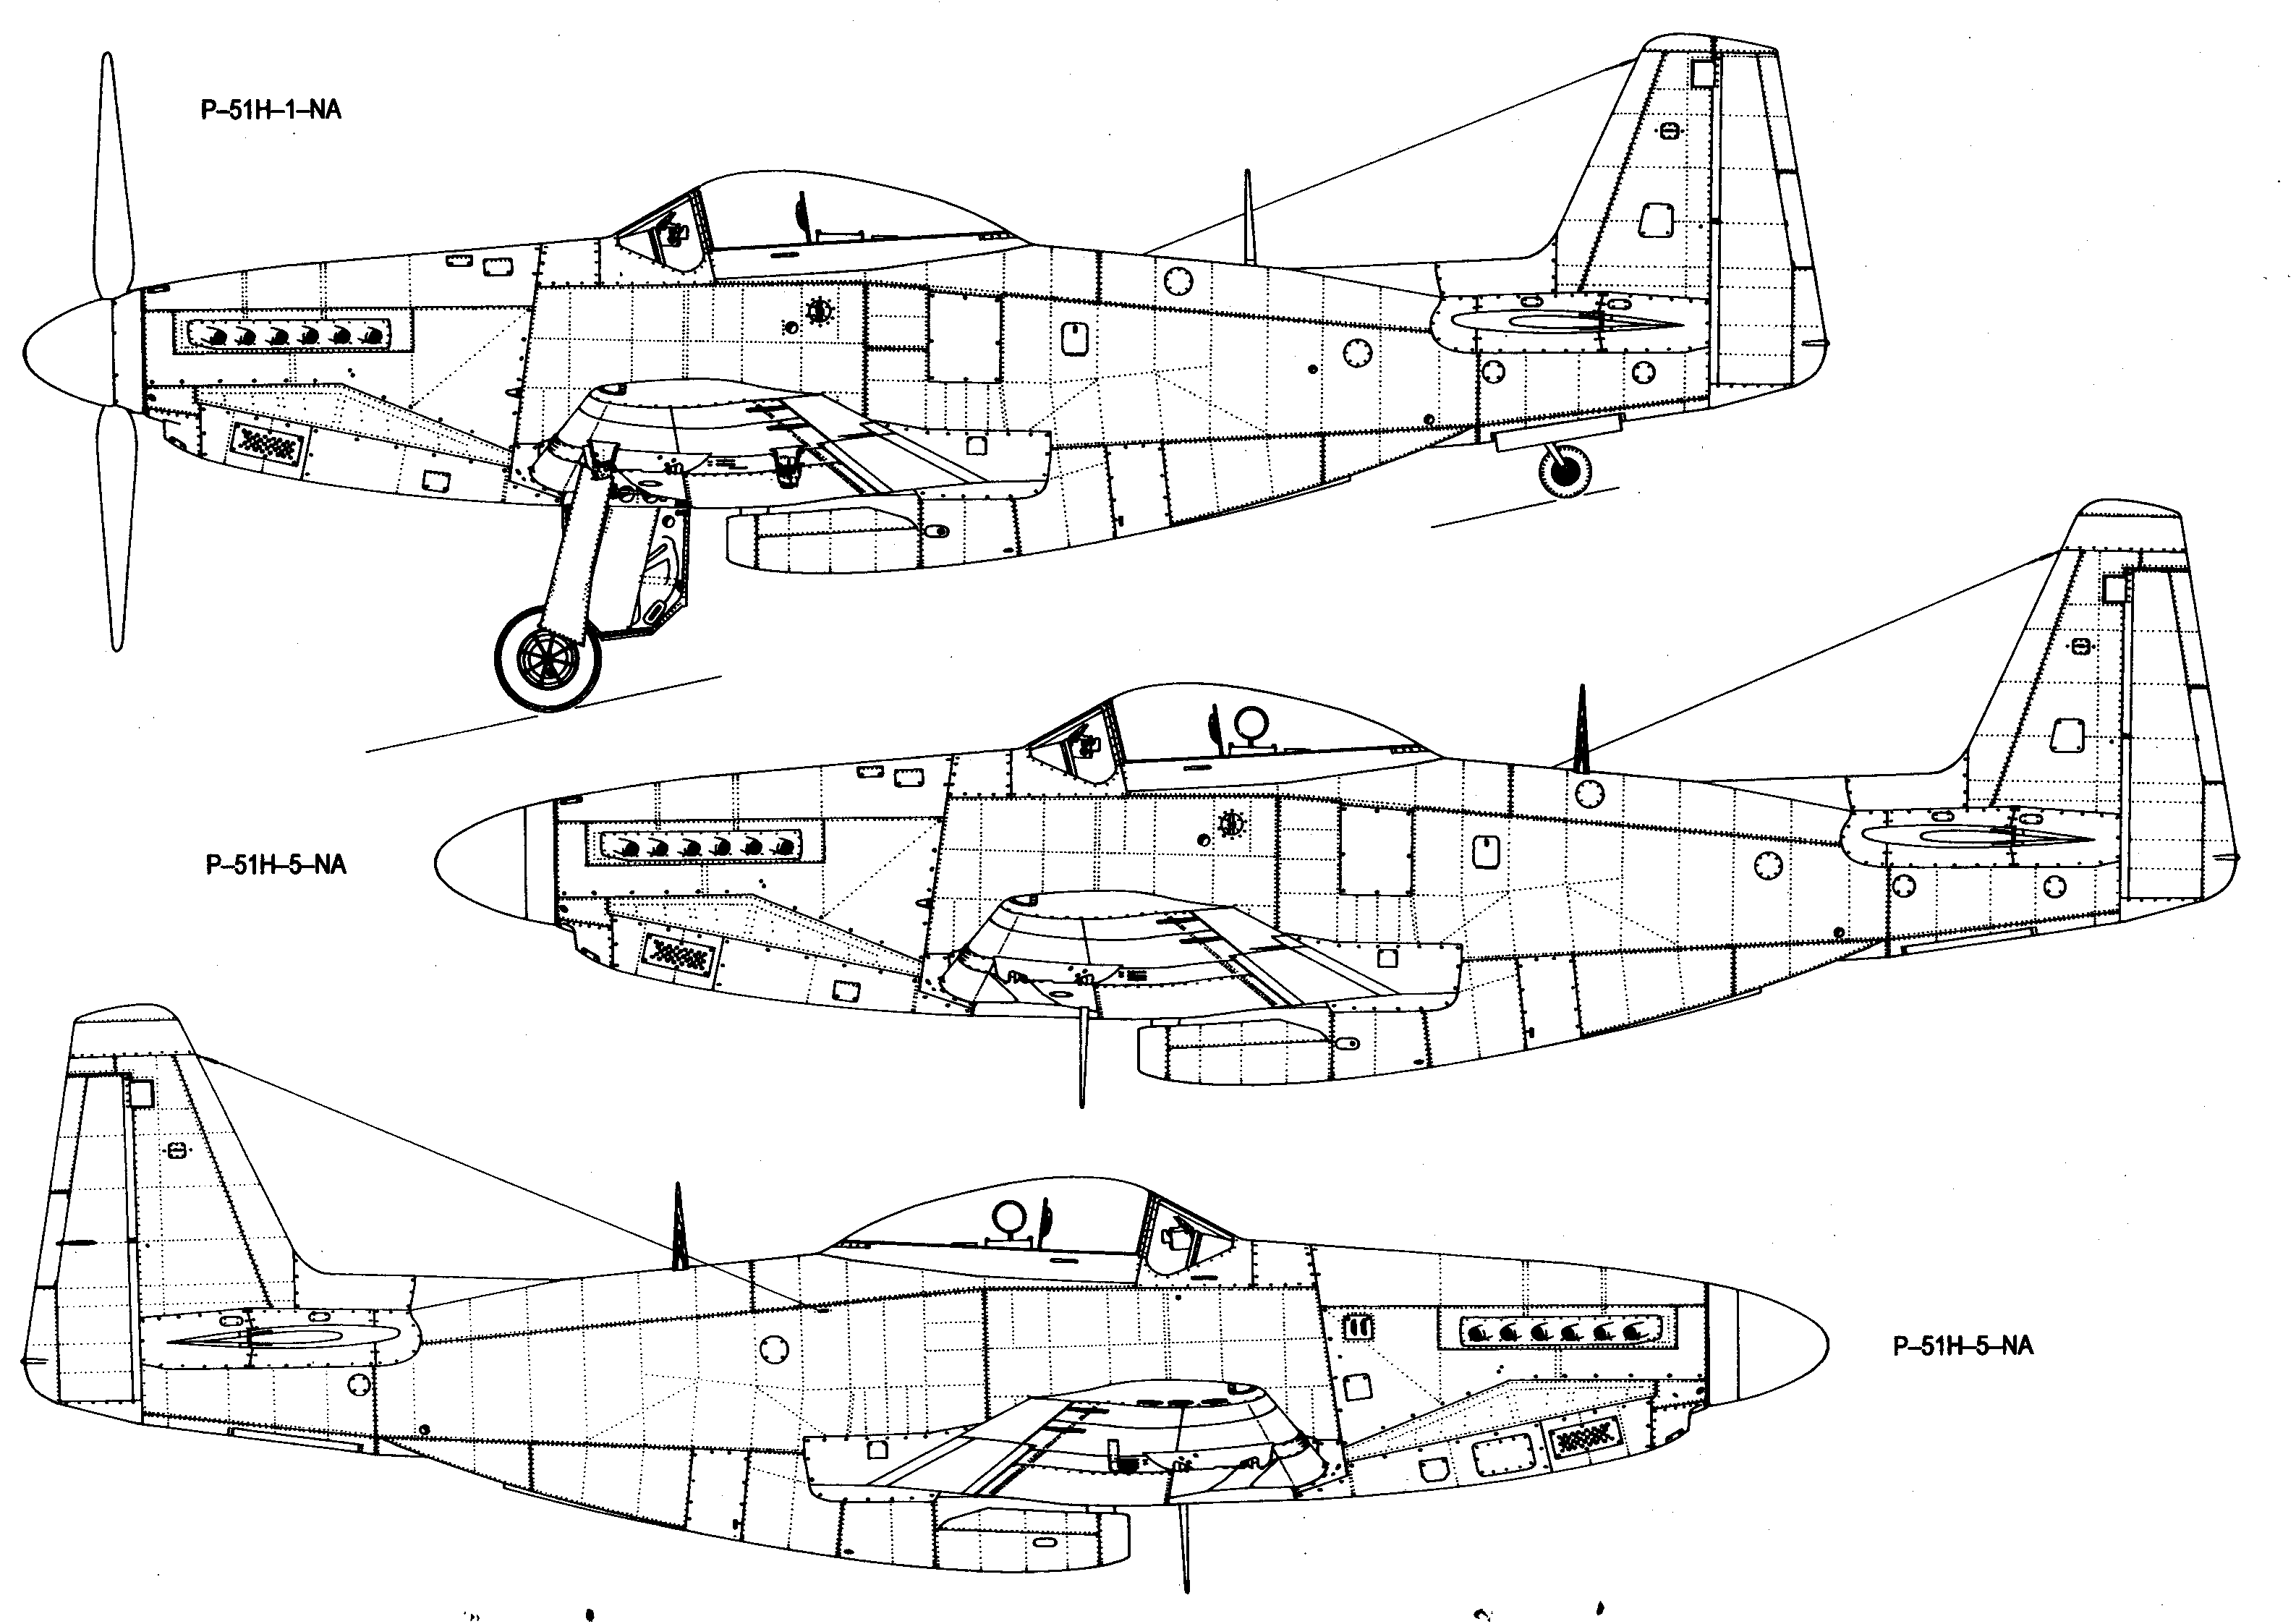
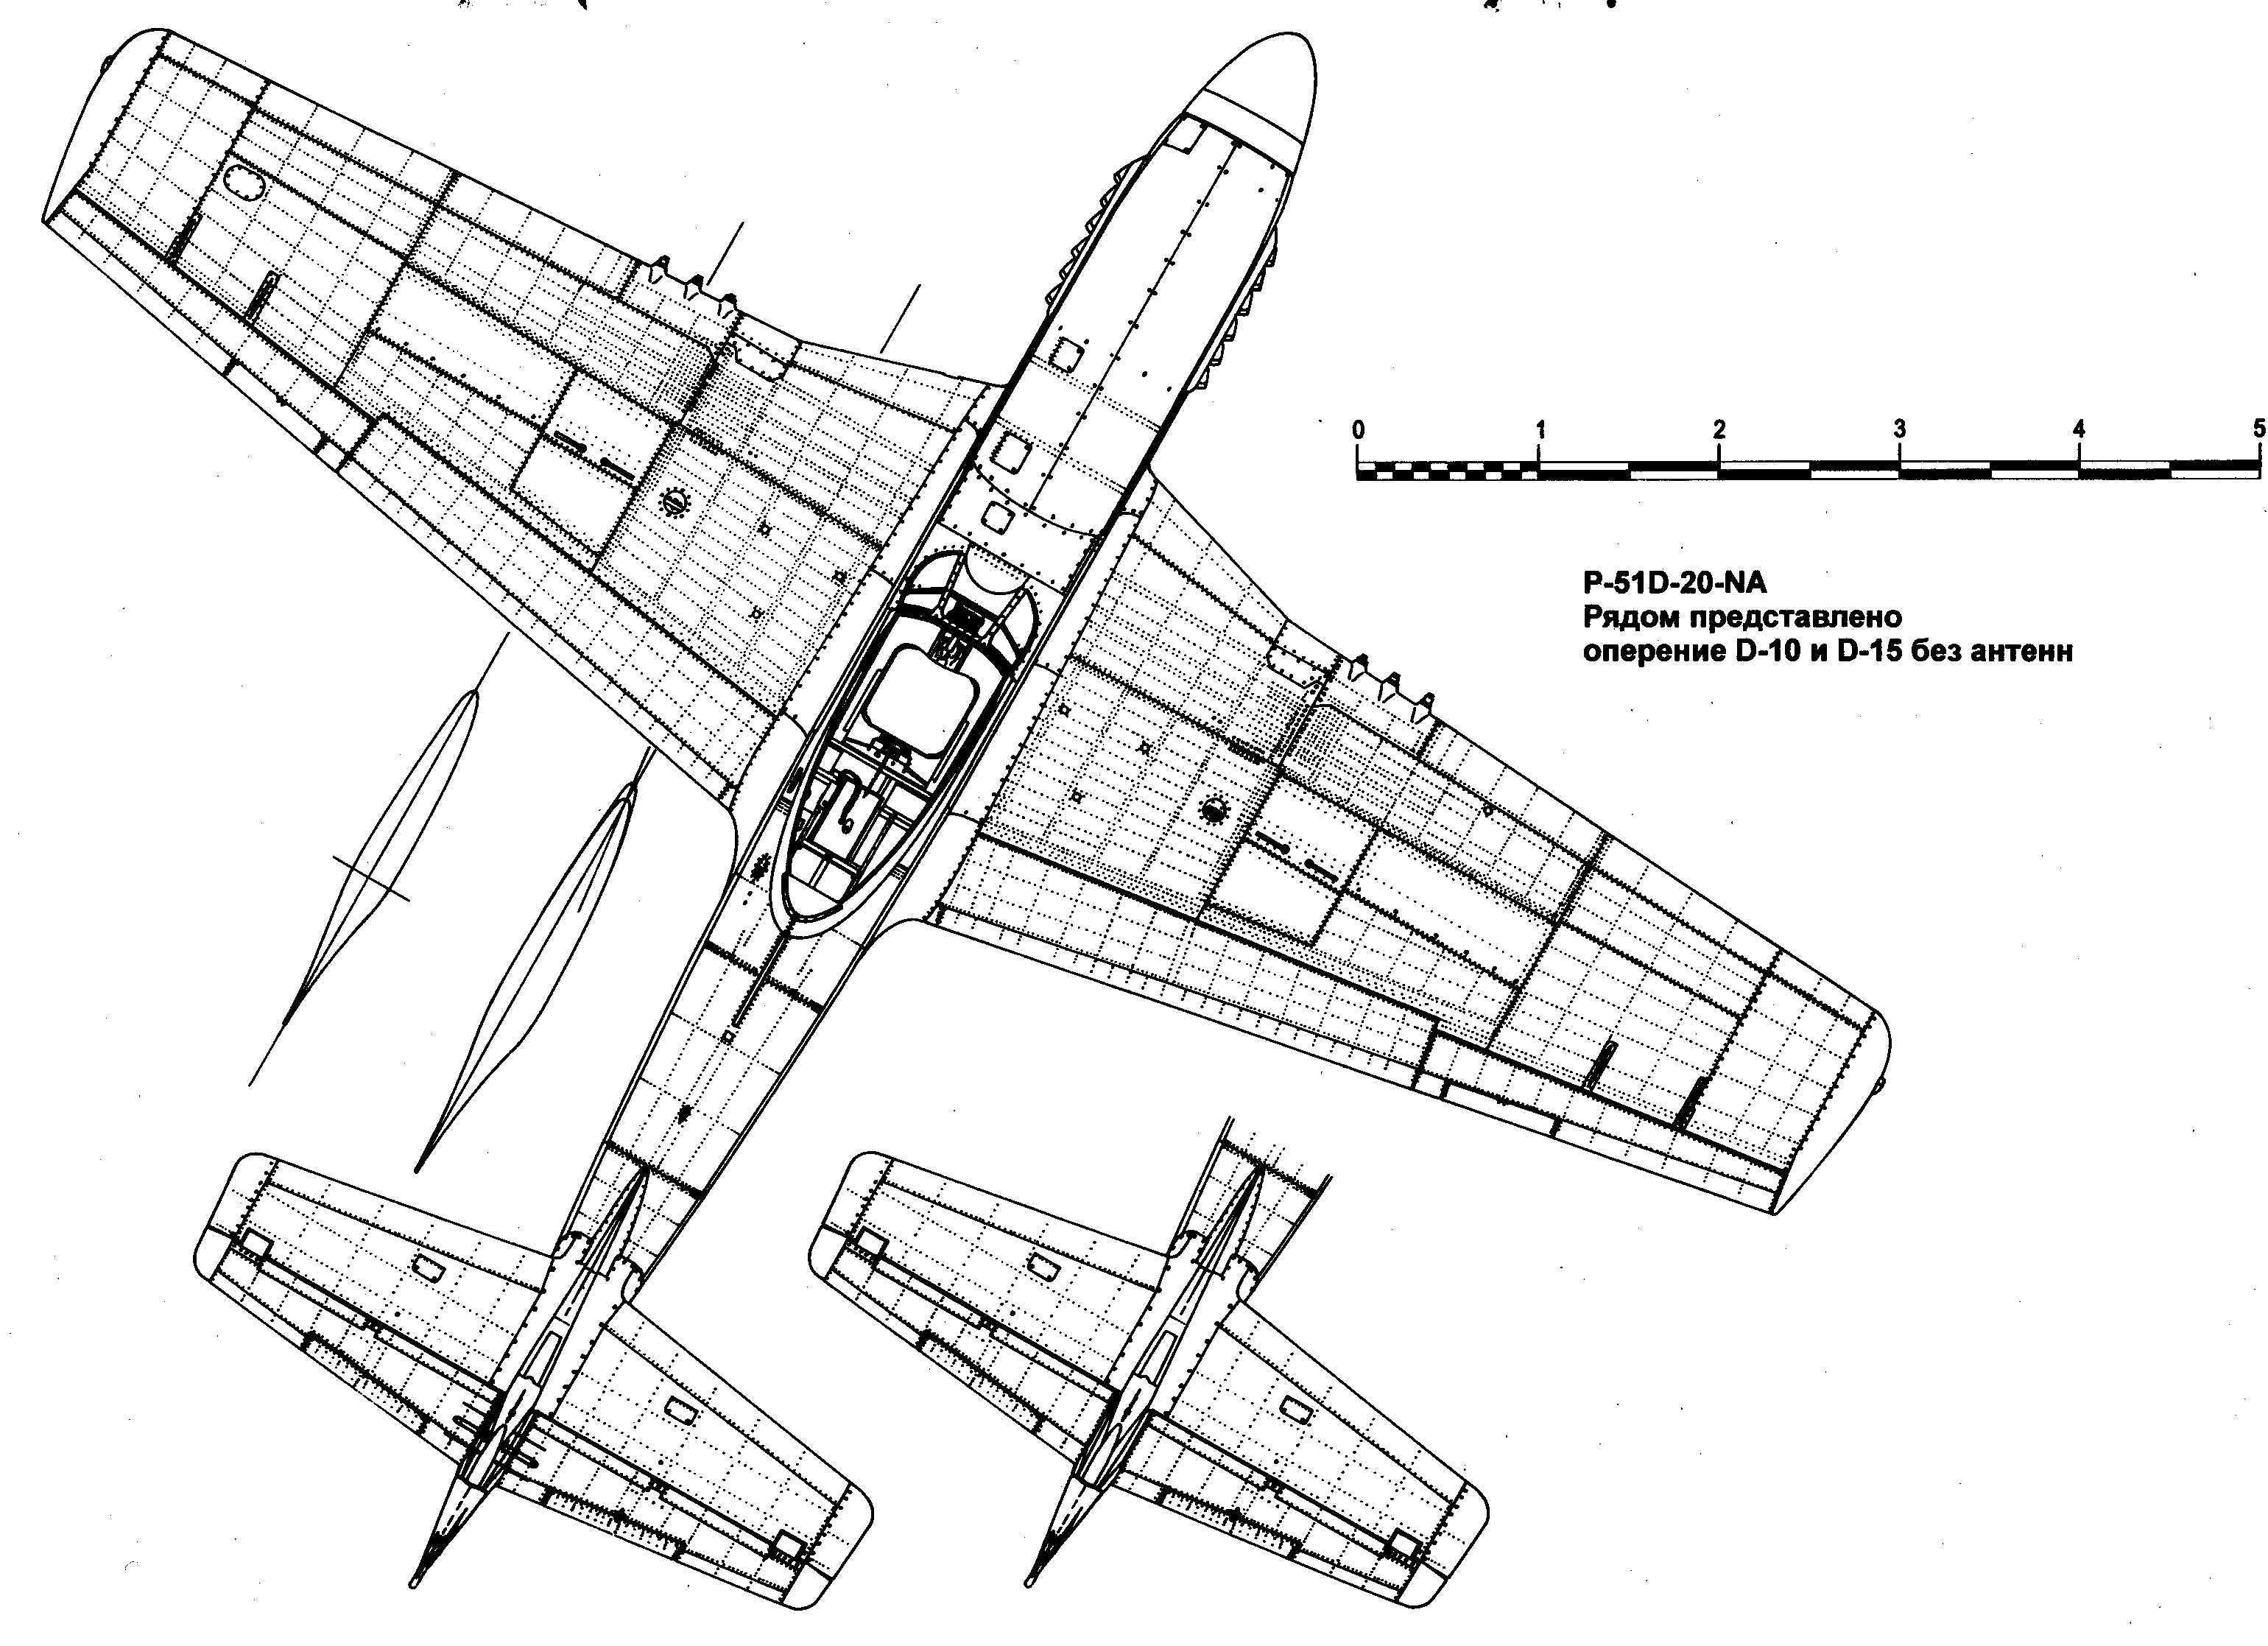
These would supply a lot of detail to the model that would make it look as real as it's simple construction would allow.
first try
The first thing I noticed was that the dihedral meant the wings were obscuring part of the fuselage. Did you get that?
So I had to paint over the wings so they wouldn't show on the model. Now this part is covered by a cowl that goes up to a specific line on the references I saw- but not on the H model the drawing shows.
I first cut away the wing, then continued the side riveting down. Then I guessed the shape of the wing cowl and stroked the outline. I finished by dotting the cowl with big rivets like the visible part had been. Incidentally, none of this compared very well to the references, which didn't compare well to eachother.
haircut
Next it was time to cut the outer parts of the hull. On the top these would have to suggest rounding, at the back they would include the horizontal stabiliser, and on the bottom the wings would be attached. After mucking about a bit I decided to forget the 'rounding' for the first, test model. I also figured out my left/right views did not match and decided to mirror one of them instead.
At this point the Mustang on the plan is 21.277cm high. I'd like to resize it so it is close to a scale size.
The D type was 9.83 meters long. To have a model my son can build, I wanted 1:43 scale. That would put the Mustang at 22.86cm. He already has a mustang that size, so it would help me develop the next version, too. I quickly scaled the drawing to 1,074399 times it's size.
Next up I needed to add the proper, bottom side of the wing and horizontal stab.
a bad fit
Once that was done, I'd need to place all parts in such a way they'd fit on 2 a4 pages.
This proved to be the most difficult part until I decided to just turn the wing until it fit. I'd liked to have had it lined up in such a way that I could print it on one cardboard sheet at one point, but then again that would require multiple fuselage prints etc.
I then started turning all the parts, as the sheet was still too high. I put the wing in the middle of the a3 and decided to aither print it as an a3 or have people assemble the wing from two parts.
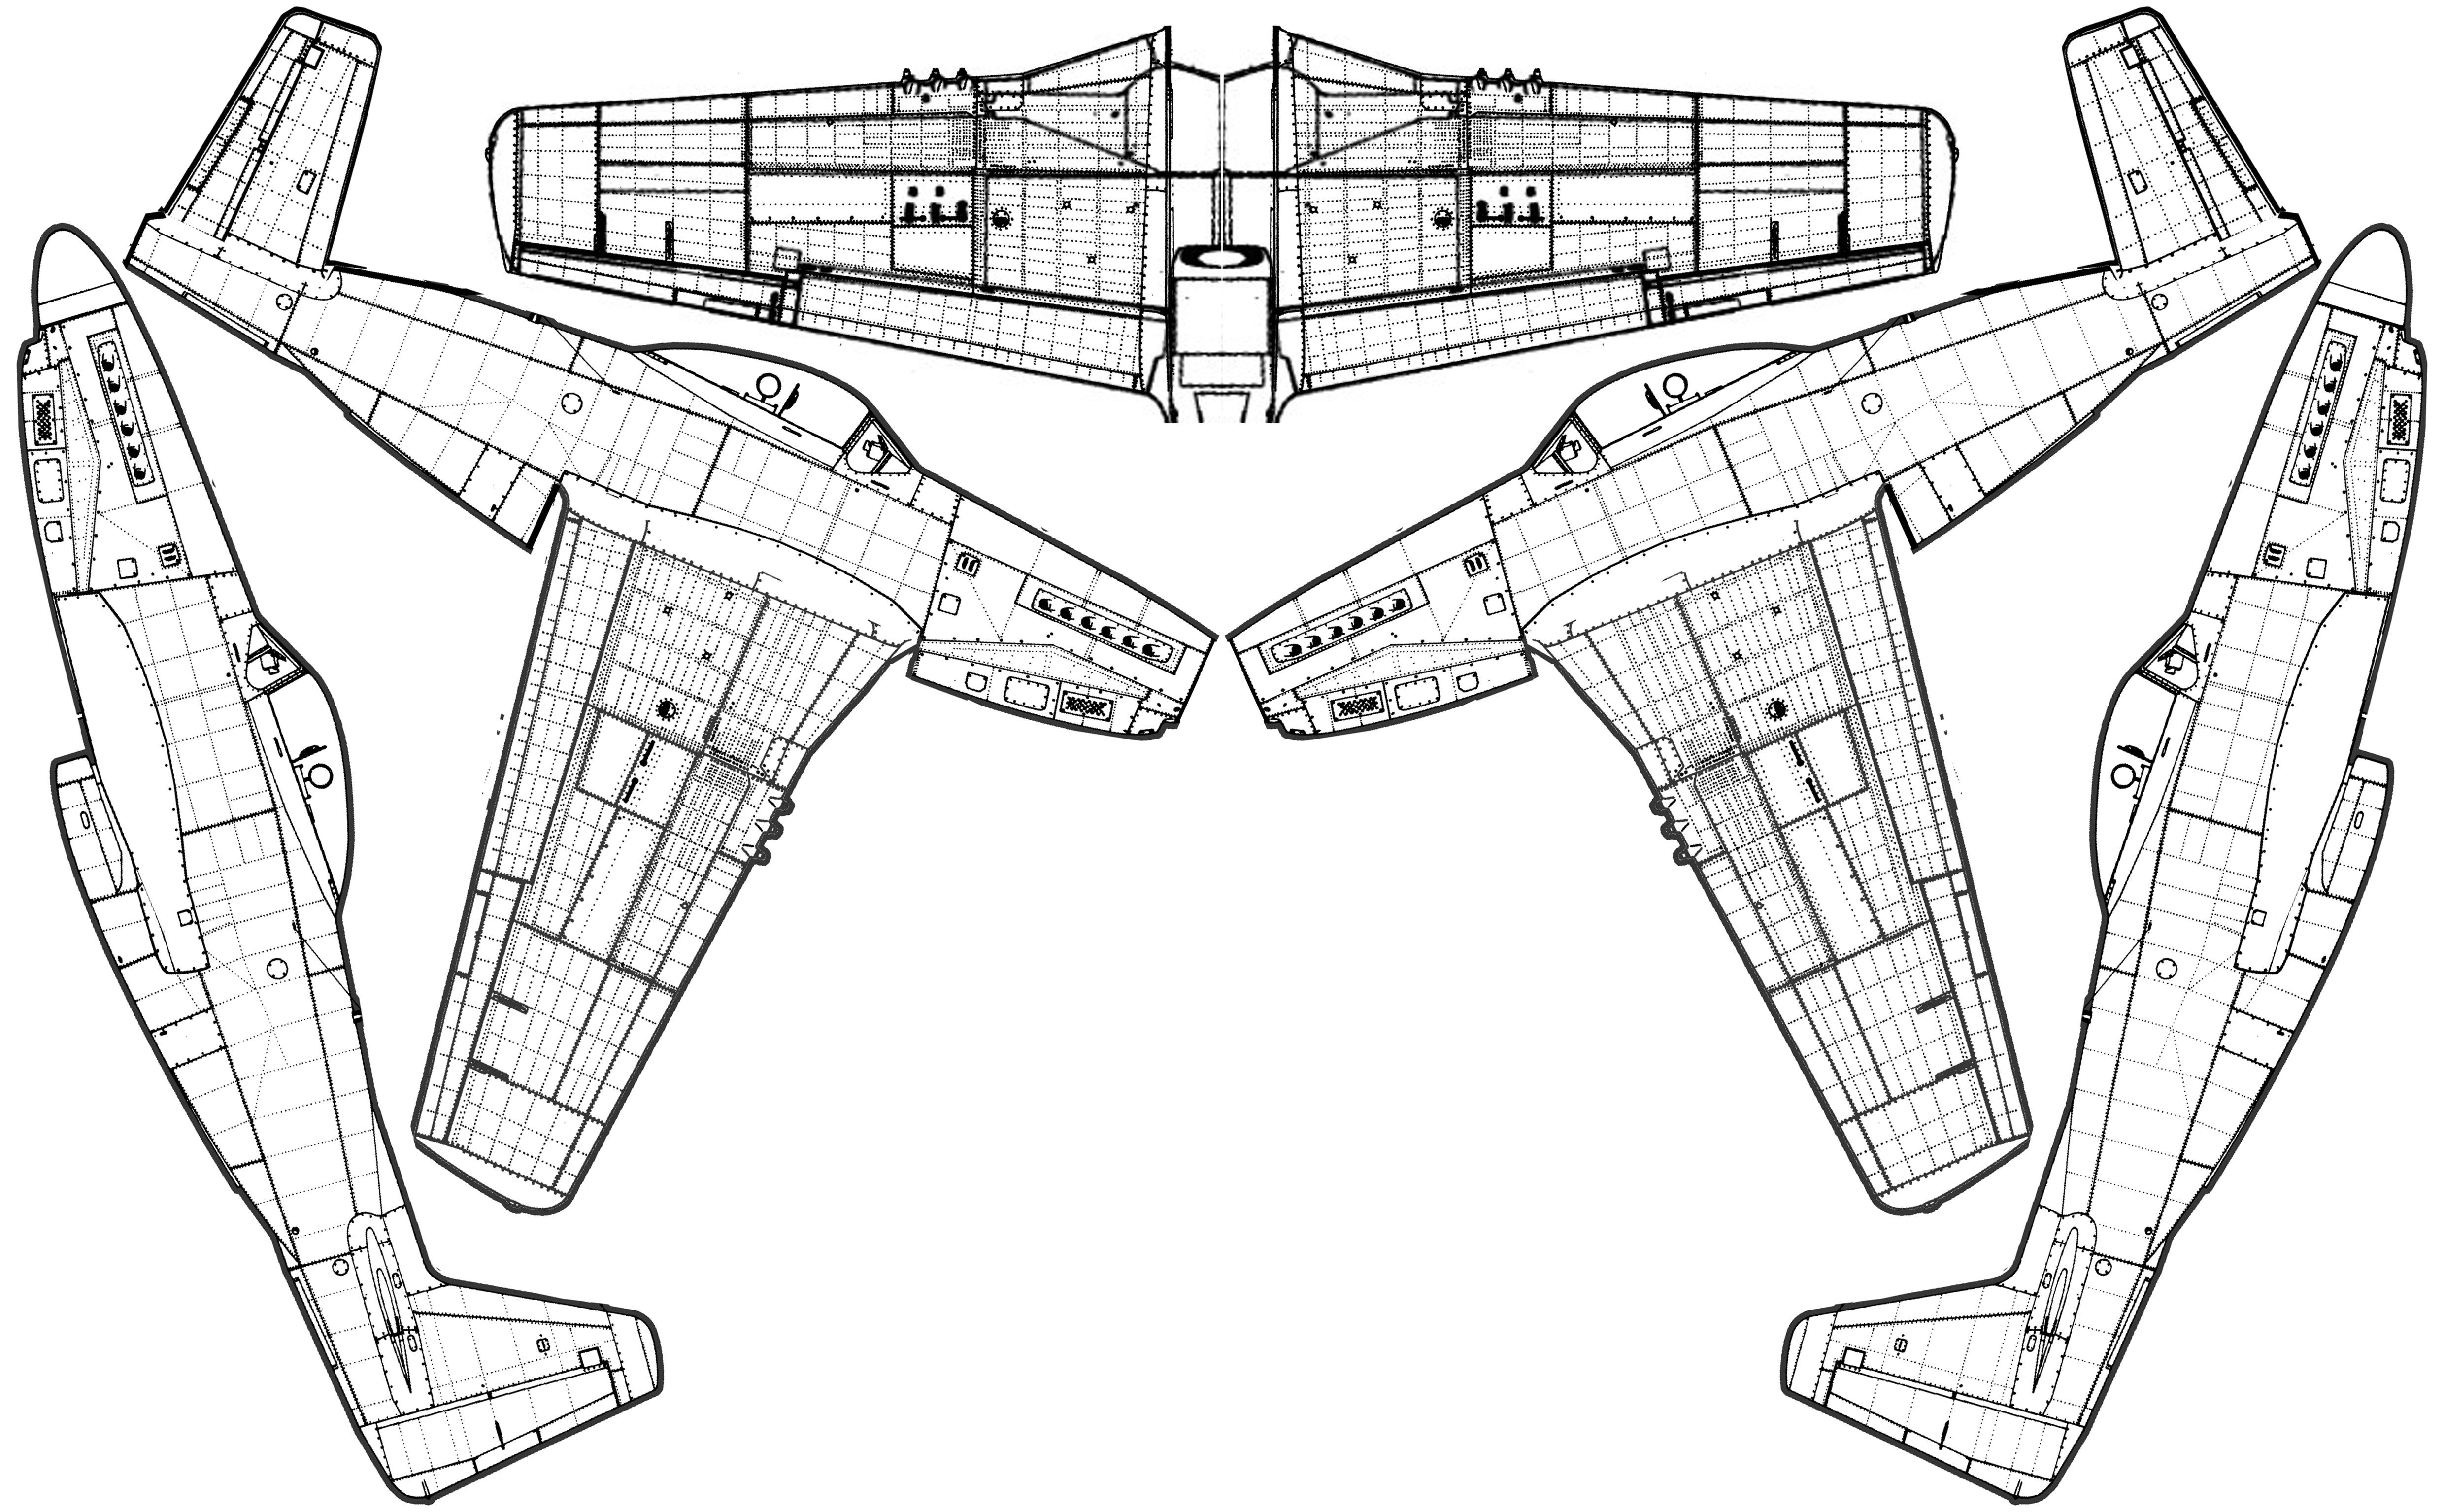
I like the style- could see it backed by a japanese rising sun type graphic. Also this was nearly there- a bit more finnicking would be needed. I decided to go and cut the rear outer fuselage in such a way as to move the inner fuselage more upwards.
bottoms up
And then I dropped this approach and decided to rather spread the cutouts over several pages.
Onwards
more is coming... when I get round to doing it!